
Have you had such experiences? When you get the long-desired gift, say the latest iPhone 14 Pro or iPhone 14 Pro Max at the first sight, you forget where to start even though you may have already thought hundreds (maybe even thousands) of things to do ahead of time. Well, the iPhone 14 is yours now, Woohoo! You need to start somewhere, and that somewhere should be the basis. Here lists 20 things you should do first when getting a new iPhone 14 Pro / iPhone 14 Pro Max.
By reading the suggestions and guides on the first 20 things you should do once getting a new Apple iPhone 14, you would avoid much trouble while using the new iPhone. Moreover, these instructions could help you start the path to become an iPhone Pro.
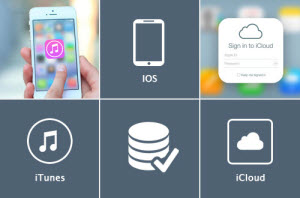
iTunes is is a big boy of Apple Inc and it is a must-have program that needs to be installed on computer. As a standalone program, it stores and plays your video or music. But when it comes to iPhone, iTunes becomes more important. iTunes offers numbers of settings for you to manage your iPhone 14 once you plug the iPhone to computer. It reads your data, give you options to add or remove music, video, apps, photos and etc from your iPhone 14.
iTunes is already pre-installed on Mac. If you are using Windows, you will need to download and install iTunes on your computer. It is Free. (download iTunes from Apple official website)
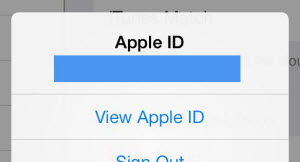
An Apple ID is essential for you to join the Apple's ecosystem. With Apple ID, you could download or buy apps from App store, purchase music, movies at iTunes, subscribe Apple music from iTunes store, access the Apple support website and more. Besides, it lets you enable iCloud, iMessage, FaceTime, and other awesome technologies on all your Apple devices.
If you don't have an Apple ID, it is totally a great loss, especially when you have an iPhone 14. Apple ID is a free account, you can sign up here.
The previous two things are mainly done on computer, but I believe you can't help using the new iPhone 14 after taking it out from the box. But, the very first and the most important thing to do is to unlock iPhone 14. If you buy an iPhone 14 Pro / iPhone 14 Pro Max off-contract from Apple, the phone comes unlocked. This means the iPhone 14 can be used on any compatible GSM carrier as long as you have that networks micro-SIM card, and the device is activated on that network. If you purchase the iPhone 14 from a carrier, you should do the following to activate the iPhone:
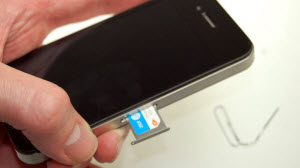
1: Insert a pin into the hole on the right side of the iPhone. This will release the SIM card tray. Pull the SIM card tray out of the phone.
2: Insert your micro SIM card into the SIM tray. Push the SIM tray back into the empty slot on the right side of the iPhone.
3: Connect the iPhone to your computer using the data cable.
4: Open iTunes.
5: Click the "Continue" button in the iTunes window.
6: Click the "Activate" button to complete the iPhone 14 activation process.
Once holding the new iPhone 14, turning your new iPhone on by holding down the power/sleep button in the top right corner. The iPhone will "say" Hello to you, follow its on-screen instruction to wipe the slider to the right to begin iPhone activation.
You are on the process of setting up your new iPhone 14. Don't worry, it is quite easy and takes just a few minutes to finish. There are two ways to activate your iPhone 14, one is with WIFI, what you need are iPhone and a WIFI network. And the other is with iTunes, what you need are iPhone, iTunes, Apple ID.
By following the on-screen instructions, you will need to select language, enable location service, choose iPhone Set Up Options, enter your Apple ID, agree to terms, enable iCloud, set security features, enable iCloud Keychain, enable Siri, choose display zoom. Now, you complete the iPhone activation process, just tap Get Started to begin.
Note: The settings can be changed whenever you want.

You get iTunes and Apple ID, it is right time to start loading it with content by plugging your iPhone into your computer. Plug the cable that came with the iPhone into a USB port on your computer and the other end into the dock connectoron the bottom of the iPhone. When you plug the cable in, your phone will begin to sync. The rest of the iPhone sync process happens in iTunes.
Once you've synced via USB once, you can change your settings and sync over Wi-Fi from now on. If you are new to Apple and don't have music from music library, ebooks, photos, movies..., you can skip this.
Why purchasing iPhone 14? No matter you are changing the iPhone model or switching from Android to Apple, for whatever reason, iPhone 14 has some unique features that attracts your eyes. Read carefully of the iPhone 14 device introduction and start to explore them to see how you feel about the new/unique features or new iOS 16 system.
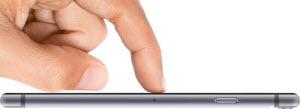
3D Touch, which allows users to press down hard on a touchscreen or trackpad to provide a different response to a usual tap, is a must-try feature when getting the iPhone 14. Others like iOS 16 system and improve cameral would let you have a wonderful experience.
iCloud Drive is one of several ways to store, sync, and update data between your Apple devices. You will find it pretty convenient to use your iPhone 14 if having iCloud, especially when you've got more than one computer or mobile device that has your music, apps, or other data on it. iCloud could back up your data to Apple's servers and re-install it over the Internet across devices, it also allows you to redownload anything you've bought at the iTunes Store, so even if you lose or delete them, your purchases are never truly gone.
Enable iCloud service on your iPhone 14 via Settings > iCloud then enabling iCloud Drive. You will see a list of default apps and data enabled for backup and syncing. Apple provides users just 5 gigabytes of free iCloud Drive space, additional Cloud Drive space can be purchased, starting at $0.99/month for 20 gigabytes, up to $19.99/month for a terabyte of space.
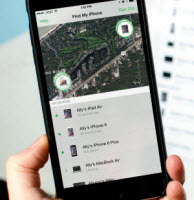
I am sorry that once you use this feature, it means that you are probably lost your beloved iPhone 14 or has your iPhone 14 stolen. But there is no time to cry, we have to do something to find the iPhone or take some actions like lock it, wipe the data. Fortunately, there is way to track. Find My iPhone is a feature of iCloud that lets you use the iPhone's built-in GPS to pinpoint its location on a map.
Set it up by going to iCloud.com on a web browser on the Mac or any PC. Once a device is located, you can remotely message is, have it make a sound, lock it, or wipe it entirely. With Activation Lock, Find my iPhone can even prevent a this from disabling the service.
Note: Find My iPhone app is not necessary.

Setting up and using Touch ID are as important as Find My iPhone to keep your iPhone 14 secure. Touch ID is built into the Home button and allows you to unlock your iOS device simply by pressing your finger onto the button. It aims to replace your passcodes and App Store password with a fingerprint scan.
Touch ID is automatically configured during the iOS Setup Assistant process (View #5). If you didn't configure Touch ID during the setup process you can do it by following these steps:
1. Tap Settings > General > Touch ID & Passcode > Touch ID.
2. Tap Add A Fingerprint
3. Press one finger to the Home Button and hold it there until the phone vibrates.
4. Continue to tap the Home button, slightly changing the angle of your finger each time
The passcode is also useful because it ensures you will be able to unlock the phone in the event that your fingerprint is not recognized.
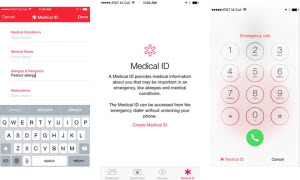
Medical ID which was introduced in iOS 8, can provide important personal health related information in the event of an emergency. This could include medications you take, serious allergies, emergency contacts—anything someone would need to know when giving you medical attention if you weren't able to talk.
A Medical ID can be a big help unless you set it up before you need it. Users can configure it by launching Health, tapping the Medical ID menu in the bottom right, and then choosing "Create Medical ID."
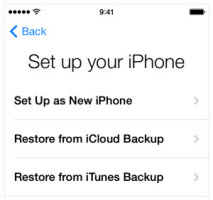
It is annoying when everything seems to be ready but suddenly left one thing. Once you turned on the new iPhone 14, you would be asked if you want a new phone or a restore backup. If you have not backed-up data of your previous iPhone, you have to pick up your old iPhone again to do the backup first.
iTunes, iCloud or third-party iPhone data backup are capable of doing this. Set iTunes for example, plug your old iPhone to your computer via the appropriate USB cable and fire up iTunes. Select your iPhone and under backup, choose this computer. Click the button to backup now.
Doing a backup is vital.
After having the backup from the old iPhone, it is time to restore it to your new iPhone 14. Tell your iPhone you want to restore to an iTunes backup. Once your phone is up and running, then you can switch back to iCloud backups if you prefer, in Settings > iCloud > Backup.
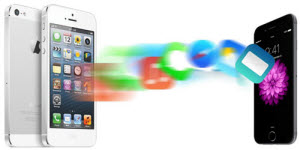
Changing the phone, does not mean throw everything out from the old phone. You will not want all your data including photos, apps, notes, messages, contacts, videos, music lost when changing the phone. And you must do not want to type every contacts number one by one on your new iPhone 14. Here comes the solution:
If you transfer data from old iPhone to new iPhone 14: use iCloud, iTunes or iPhone data transfer to transfer content between two iPhone devices.
If you transfer data from Android phone or Windows phone to new iPhone 14: use phone to phone transfer, even you change the carrier.

You still have more options like keeping, trading, selling, donating. If you decide to turn your old iPhone into cash for the new iPhone 14, read the listed some of the best ways to break up with your old iPhone, and get your hands on newest iPhone model.
You could trade your old iPhone in Apple, Your mobile carrier, Amazon, Best Buy, Target, Radio Shack, eBay, Walmart, GameStop.
No matter you are trading the old iPhone or donating, you must be sure that all your personal data or settings are wiped clean before giving away. It only takes a few steps, and few minutes, and it makes sure you're data is protected.
Before started, we strongly recommend you do a full backup. Follow these instructions to clear the data off of your phone.
1. Tap the settings from the home screen
2. Tap the "General" settings menu item.
3. Choose the "Reset" menu item.
4. Tap on the "Erase All Content and Settings" menu item.
To avoid "data theft" recovering your wiped data of your iPhone, it is suggested to use the professional iPhone data eraser (for Windows / for Mac) to wipe all information to keep your personal data safe.
Before you going to the App store to download and install apps, we suggest you try the built-in apps in iPhone 14 first. The iPhone comes with a pretty great selection of built-in apps for web browsing (Safari), email, photos, music, calling, and more.

What? You just talked to learn the built-in apps in the #12. And now you say the replacing? It sounds crazy. I have to admit that the apps included by Apple are great, but they don't fit every user's preferences. To take your device to the next level and to take over those iOS defaults, you can consider these excellent replacing apps:
Mailbox by Dropbox; SwiftKey Keyboard by SwiftKey; Evernote by Evernote; Fantastical 2 for iPhone - Calendar and Reminders by Flexibits Inc.; Wunderlist: To-do list & Tasks by 6 Wunderkinder; Camera + by tap tap tap; Google Maps by Google Inc.; WhatsApp messager by Whatsapp Inc.
Once you've spent a little time with the built-in apps or the replacing apps, your next stop is the App Store, where you can get all kinds of new programs. Have not prepared yet? You can simply start from checking the apps in editor's pick or browsing the category.
Whether you're looking for games or an app to watch Netflix on your iPhone, ideas on what to make for dinner or apps to help you improve your workouts, you'll find them at the App Store—and usually just for a dollar or two, if not for free.
At this point, you'll have gotten a pretty solid handle on the basics of using the iPhone 14. But there's so, so much more to the iPhone than the basics. It holds all kinds of secrets that are fun and useful. Read the manual of iPhone 14 and get familiar with all the settings in your new iPhone 14.
One more thing. Let's take it easy. Even though the above listed 20 things to do when getting a new iPhone 14 Pro or iPhone 14 Pro Max, it takes just some minutes to do that especially with the application. You don't have to do all of them in the list, what you should do simply according to your needs. Have other ideas? We welcome you share your thoughts on things to do after having your new iPhone 14 Pro / iPhone 14 Pro Max.
Try reliable iPhone data recovery -- Recover them back, no panic anymore!
Home | Sitemap | About | FAQ | Contact | iPhone File Transfer | iPhone Data Recovery | Phone to Phone Data Transfer | The Fastest Video Converter
© Copyright 2012-2021 M2mate Inc. All rights reserved.


